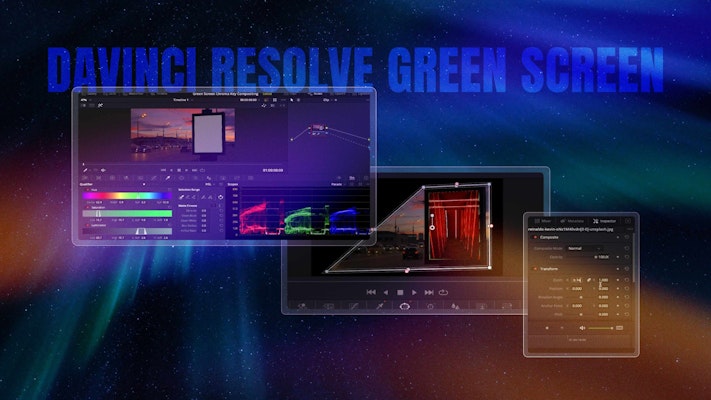
Whether you are a colorist or video editor, at some point in your career, you will probably have to learn how to do chroma key compositing. In more simple terms, that means how to replace a green screen with another image.
Luckily for you, DaVinci Resolve has some powerful tools so that you can work on your DaVinci Resolve green screen video. That means you won’t have to switch to different software or pay for a new, expensive tool.
In this tutorial, you’ll learn the simple steps to take your green screen clip and composite it with another clip. Before you know it, you’ll know how to replace your green screen in a flash, and learn some useful techniques to make it look as realistic as possible.
Summary
Part 1: How to Edit Green Screen Footage in DaVinci Resolve
In DaVinci Resolve, it will take you just a few steps to go from two separate clips to a simple composite image. For this example, we’ll be using this green screen stock footage if you’d like to download and follow along. Or you can explore the other green screen images in our library if you don’t already have any footage to use.
Step 1: Importing Footage
To start your project, decide which multimedia clips you want to use and import your files. Of course, you’ll need a minimum of two: one clip with a green screen, and one clip to replace the green screen.
- Open your desired project in DaVinci Resolve, or start a new one.
- Click on the Media Pool icon in the top-left corner of your window.
- Right-click in your Media Pool and select Import Footage.
- Browse your computer and select the clips you want to import, and then click Open.
Step 2: Setting Up Your Timeline
Make sure your timeline is configured properly so that the area with the green screen will be replaced with the footage you want it to later on when it’s transparent.
- Make sure the Edit icon has been selected in the bottom bar.
- Drag your two chosen clips into the timeline space on your screen. DaVinci Resolve will automatically create a new timeline for you based on the specifications of your clips.
- Position the clip with your green screen on the video track (the row) above your background footage. If there isn’t another video track, simply drag your video up from the video track it’s on, and DaVinci Resolve will automatically create another one.
- Put the clip you want to replace your green screen on the above track, and make sure its start and endpoints line up with your second clip.
Step 3: Chroma Keying
Now that your timeline is prepped, it’s time to get rid of that green screen!
- Switch to the color correction window by clicking on the Color icon at the bottom of the screen.
- Select the Qualifier tab.
- Click on the Qualifier Tool underneath the heading Selection Range.
- Hover over the green screen area, and left-click. This will select the color you want to isolate and make any other colors transparent.
- View the area you have made transparent in gray by clicking on the Highlight icon.
- Press the Invert Selection icon to reverse the gray area so that only your green screen is transparent.
Step 4: Alpha Channel
You have told DaVinci Resolve which part of your video clip is the green screen, but now you’ll need to blend it in with the footage you’ve put underneath.
- Select the Nodes icon to view the Nodes workspace for the footage you currently have selected.
- In the Nodes workspace, right-click in a blank area and select Add Alpha Output. Your alpha output will appear as a small blue dot on the right of the window.
- Click and drag the small blue square on your node to draw a line to the Alpha Output icon. This acts as a set of instructions in your node system to blend your green screen footage with whatever multimedia is on the video track below.
- Click on the Highlight icon again, and you will see your new composite image.
- This is a good time to reposition either layer if you need to. You will learn more about how to do this in part two.
Learn more about working with alpha channels in DaVinci Resolve in this tutorial.
Step 5: Masking
With some green screen footage, you may find it necessary to crop out undesirable objects that made their way into the frame. This can be done with Power Windows, also known as masks.
This is a useful technique if you want to resize or reposition your green screen layer. Basically, anything in your green screen footage that’s inside the Power Window will be visible. Anything on the same layer that is outside of the Power Window’s boundaries is cropped out. Now the space outside of your Power Window will appear as whatever’s on the video track below by default.
- Click on the Window icon.
- Select the Shape you want your Power Window to be.
- Readjust the edges of the Power Window by clicking and dragging the points on its outline. For example, if you’re editing a talking head and there’s a scratch on your green screen you want to crop out, you can shrink the edges of the footage. Just make sure the Power Window will not crop out your subject’s head or hands as they move.
- Further refine your Power Window shape with the values under Transform (your shape’s position, angle, and opacity settings) and Softness (the softness of your shape’s edges) in the Window workspace.
Step 6: Refining Edges
Perhaps there are still some green edges around your subject that are visible in the preview window. This is the time to use some of the other tools that DaVinci Resolve has to offer to make them cleaner.
- Return to the Qualifier tab.
- Press Shift + Control + H to toggle the High Contrast Highlight mode. This setting lets you preview where your transparent area starts and stops in black and white. This can make it easier to spot any color disturbance compared to color mode.
- Bring up the Clean Black value to clean up any black disturbance in the white areas, or increase the Clean White value to remove small areas of white in black areas.
- Use the In/Out Ratio to shrink your transparent area’s edges or to expand them.
- Use Blur Radius to make the edges of the transparent area appear softer.
- Press Shift + Control + H from time to time to check that you are happy with the image’s appearance in color mode, too.
- Change the Low Saturation threshold to 0. You can continue to adjust Hue, Saturation, and Luminance to better target certain tones and levels of saturation or luminance of the green color you are targeting.
Step 7: Color Correcting & Exposure
To make your footage blend more naturally, remember to do some simple color and exposure adjustments to the footage that you are adding to the foreground. In this example, that is the image that will replace the green screen on the billboard.
In this tutorial, you will adjust the image’s Curves and Color Wheel. Don’t forget that DaVinci Resolve has many other color tools that you could use too!
- Click on the Clips icon to view which clips are available from your timeline.
- Select the clip you want to color correct.
- Click on the Curves icon.
- Lower the highlights and create an S-shaped curve.
- Select the Color Wheels icon.
- Toggle the Offset wheel down by clicking and dragging it to the left.
- Lower the reds in the gain by clicking and dragging the bar down.
Part 2: Pro Tips & Troubleshooting
1. Color Spill
You might find different tones of green on your green screen due to varying shadows and light. Sometimes you can even have green reflections on your subject. If you find yourself in that situation, there’s another way to improve the accuracy of your color selection. Use this tip in place of points 2-4 in Part 1, Step 3 and you’ll be good to go!
- Make sure you are on the Qualifier tab.
- Click on the dropdown menu that says HSL, and select 3D.
- Choose the Qualifier tool.
- Click and drag your mouse on a small selection area of your green screen (that’s as close to the edge of your subject as possible). The edge of your subject usually has the most varying tones and is likely to achieve a more accurate selection of your green screen.
- Tick the box that says Despill. This should target any green reflections on your subject.
2. Making Your Footage Look More Realistic
Was the element that you’re adding to the scene shot at a slightly different angle than you want it to appear in the new scene? If so, DaVinci Resolve has some features to help your subject blend in better.
- Click on the Edit tab.
- Select the desired clip.
- Click on the Inspector icon.
- Adjust Zoom, Position, and Rotation until your subject is in the right place.
- Adjust Pitch and Yaw to make your subject appear at a vertical or horizontal angle.
As you can see, DaVinci Resolve green screening skills are useful for all sorts of projects. Whether you’re chroma key compositing a talking head or a highway scene with a green screen billboard in your project, these tips will always come in handy. You’ve just added a whole new realm of possibilities to your creative toolbox. So why not go and start putting them into practice?


