We prefer to use a central hub for smart devices. SmartThings is the hub of choice, and Alexa is the voice assistant for voice control. If you don't have that kind of setup, it's A-OK. Once you set up your lights in Cync, go to Alexa and look for the Cync skill. Authenticate and approve access. Alexa will pick up the new devices almost instantly.
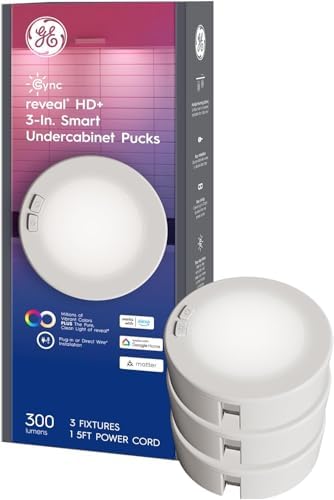
They look great as undercabinet lighting and function perfectly. The ability to dim, apply themes, automate lighting schedules, and control them via voice is a fantastic convenience. Despite a lack of competitors in this space, these units are priced exceptionally well and reasonably—we feel they are worth every penny. The way the lights diffuse light into the acrylic panel makes it appear as a smooth light source with no "harsh" visible individual LEDs that plague most fixtures when viewed from different angles. Try their Reveal mode to see a different spectrum of lighting that enhances visuals. I would keep it enabled were it not for the lighting on my stove. I want them to match when daylight white is on, and that is the only way for me to achieve that.
Now that we know about GE's smart lighting line, we're going to shop for more of their goods. Thus far, they've been of great quality and at a much more competitive price point.
The physical installation of these units was much more straightforward than I thought it might be, given some review comments. Here are some guidelines and feedback:
* First, plug the units in with the provided wall cable. Then, set up and configure your lights using the Cync app. This process ensures you don't have to deal with resets, etc., if you have trouble. It's the same if you intend to use them with HomeKit. I did not have issues pairing with the Cync app AND Matter, but some reviewers have suggested they are mutually exclusive. I tested it, and it worked, but then I removed them from HomeKit (as I don't use it). Download the Cync app from your app store to configure using the app. Select the option to add devices and then scroll down to undercabinet fixtures. They should pop up immediately. Set their properties, save, and let the units update their firmware while at it. After this step, you can proceed to hardwire if desired.
* We wanted ours hardwired. POWER OFF YOUR CIRCUIT. Then, remove the back plate by removing the screw in the back of the unit. The plate will come loose. The wires to the unit are tucked just inside. Pull each of them out by their push-in connectors. There will be a green, white, and black one. The fixtures come with two-port push-in connectors. If you insert wires (from the wall) that are too long, it will be challenging to remove them later. Keep the slack from the wall wires long enough to work with the fixture, and you won't have this problem. I would only keep 5-6" of slack. Once trimmed, plug the wires into their corresponding units, and you're done with power. I learned this the hard way for the first fixture. If you forgot and need to open the unit, unscrew the access plate (there is a tiny screw on each side on the bottom of the unit) and reattach the plate once the wires are secured.
* Position the unit and prepare to screw it in. However, before you do, I recommend having the screws partially exposed when positioning. You can then apply some pressure on the screw to imprint on the cabinet (or mounting surface). Then you can drill some pilot holes to ensure you don't break the screws. This was a concern one other owner mentioned. Each fixture should take about 15 minutes, but your mileage may vary.


